Saturday, September 3, 2011

Two down, ? to go?

I stayed up last night until the laptop bag was FINISHED!  I like it, but I'm glad it's done!  I doubt that I would agree to make one for someone else -- it was pretty labor-intensive.  There are pictures, and they probably don't need any captions!


This morning I got busy and sewed the binding on my Sudoku quilt.  This was quick and easy, and I'm posting a couple of pictures of that


I tried to rotate this picture, but couldn't!  Tip your head to the left, and you'll get the idea!

So this afternoon I should get my quilts for Den and Graysen back from the quilter in Arkansas, and then I'll have THREE ready to put binding on:  Becca's robot quilt, and the two for the boys.  It must be time to start another project!

Wednesday, August 31, 2011

Two steps forward?


I finished one donation quilt, using the quilt-as-you-go technique Connie taught us in July.  It was quite simple, and it made me happy to see how nicely it worked!  This quilt (table-topper) will be raffled off at an event in McPherson, KS -- Women & Children Combatting Cancer.  I have four more to finish now.

I have two quilts waiting for binding:  Becca's robot quilt and my Sudoku quilt.  So what do I do?  Of course -- I started another project!
After receiving my new MacBook Air from USD 500 last Wednesday, I decided I wanted to make a quilted bag for it.  I don't want to buy a pattern, and I don't think I need one, but I decided to start by making a "quilt-as-you-go" piece to work with, rather than going out and buying pre-quilted fabric!
The pictures show the progress I've made so far (by Weds., Aug. 31).
These are the fabrics I decided to use:  the turquoise background with starbursts will be predominant, with the strips of flowers on beige and navy and tone-on-tone beige interspersed.  The brown with typed letters will be the backing.

This is the quilted piece I ended up with.  I sewed two strips together (watching carefully the order, etc.), and then I sewed those together as I quilted to the batting and backing.  Notice, it ended up being strip sets of seven, repeated in a way that made the turquoise four of the seven strips.  I'm pleased with the overall appearance of the "quilt."
This shows the quilted piece and the backing.  I will also use some of the backing fabric to make pockets inside the bag for the charger & cord, flash drive(s), and writing/marking utensils.  The quilted piece will make up the bag, with enough to make an individual compartment for the laptop.

Now all I need to do is figure out the gussets (sides) of the bag.  I want it to be quilted also, so I may have to quilt a little more.  Then I have to figure out the best way to join the gussets to the bag and the strap to the gussets.  I plan to use binding on the seams inside the bag so that there will be no raw edges on my finished bag.  More later -- hopefully it will be finished by Friday!

Tuesday, August 16, 2011

Janelle's first quilt

This is the quilt top that Janelle made for her good friend Megan, who is having a boy this fall!  Janelle made this on Day ONE of our quilting retreat, and I think she did an awesome job, considering it was her FIRST! She made some "design decisions" that guaranteed it would be a "one-of-a-kind" quilt -- hope Megan like it!

This shot shows the backing that Janelle chose for her quilt.  If you could see it up close, you would recognize heavy construction equipment on a bright blue background.
Janelle made this fairly quickly, but I think she got a little frustrated!  Hopefully, her first effort won't be her last!

Saturday, August 13, 2011

Progress!

I got a call Thursday from Cathy, saying my Robot Quilt (for Becca) is ready to be picked up!  So Friday (after a GRUELING first day of school!), I went to pick it up.  I looks great -- now all I have to do is add the binding!  I'll be working on that soon -- probably on some of the evenings I am home taking care of Destiny & Jocelyn while Melyssa is in class.
I also picked up Michael's first quilt, and it looks very nice!  Cathy was impressed with the fact that he made it, and she is also looking forward to seeing his future projects.  When Michael and I talked today, we discussed the fact that his next "lesson" will need to be about adding binding to a quilt.  We'll have to arrange an after-school time to work on that!
While I was there, I chose thread for my Mary Engelbreit/Sudoku quilt.  I'm very anxious to see that one completed, since it will be the ONE quilt from the summer that I will keep for myself!  It's also one that I figured out on my own, so it's more "original" than anything I've done before.
I did journey up to the 3rd floor on Thursday to see CJ's work.  She has completed the quilt tops for both of her daughters, and I really like the variety of styles she came up with.  (I'm sorry I didn't take pictures to post, but you can go to Michael's blog quillsandquilting.blogspot.com.)  She is working on "free-motion" quilting, and that looks AWESOME!!!  I was especially impressed with how deliberate she is about practicing and working the leaf into her stipple design.  These quilts will be special treasures for her girls!

Monday, August 8, 2011

Scrappy Friendship Quilt(s)

This is the "Barn Raising" pattern, in mostly greens & browns, with a little red added for fun.  This quilt will be about 40" X 40" when finished.

This pattern is "Streak of Lightning," the the quilt will be about 30" X 40."  The dominant color is blue, in various shades.

This is a "Diamond" pattern, and I'm not sure I have it laid out the way I meant it to be!  There are reds and pinks, and it will be 30" X 30" when finished.

This design is called "Fields and Furrows," and I used mostly purples and pinks.  This quilt will be 25" X 30," so it will probably be about the right size for a table topper.

This is the "Pinwheel" design, and it is primarily green, with a purple center.  The finished quilt will be 30" X 30."
These quilts are the result of my annual "Sisters' Quilting Retreat," which took place this year in McPherson, KS.  Each of us brought (approx.) 200 squares:  100 light and 100 dark, 6-inch squares.  These were all laid out on two tables, and then we each chose 100 light and 100 dark squares, not necessarily the ones we had brought.  A light square was paired with a dark square, and they were sewn together on the diagonal and then cut apart, pressed, and squared to 5 1/2" squares.  After doing all this, the fun began!
We had talked about making quilts to donate to charities/causes we have interest in, so each of us will do that on our own.  Instead of making one HUGE quilt, I decided to make several smaller ones.  I will keep one as a memento of the retreat, and I will give the others away as I have occasion to do so.  I've already designated Janelle's WACCC group (Women & Children Combat Cancer) to receive one, and I will also donate one to Mount Hope Sanctuary in McPherson.
I'm going to try something Connie introduced us to at  the retreat -- "quilt as you go."  I have purchased batting and adhesive, so when I have sewn the squares into rows, I will begin adding the rows, one at a time, to the batting/backing layers.  I'll have to write about that process another time!

Monday, August 1, 2011

Mary Engelbreit/Sudoku quilt

The first time I saw a reference to a "Sudoku" quilt, I couldn't imagine what that would be!  However, this summer I saw a kit in a quilt shop, and I looked at it briefly.  Suffice it to say, I saw quickly that a kit was an unnecessary expense!
I have been collecting Mary Engelbreit pieces over the past several months, with no idea how I would use them, but wanting to make some type of quilt that would showcase this artist that I have admired for several years!  As I thought about a sudoku quilt, I realized that I had almost enough ME pieces to do this type of quilt:  9 different  ones.  SO when I returned from my reunion/sister quilting trip, I got out my ME fabrics and began to plot/plan!
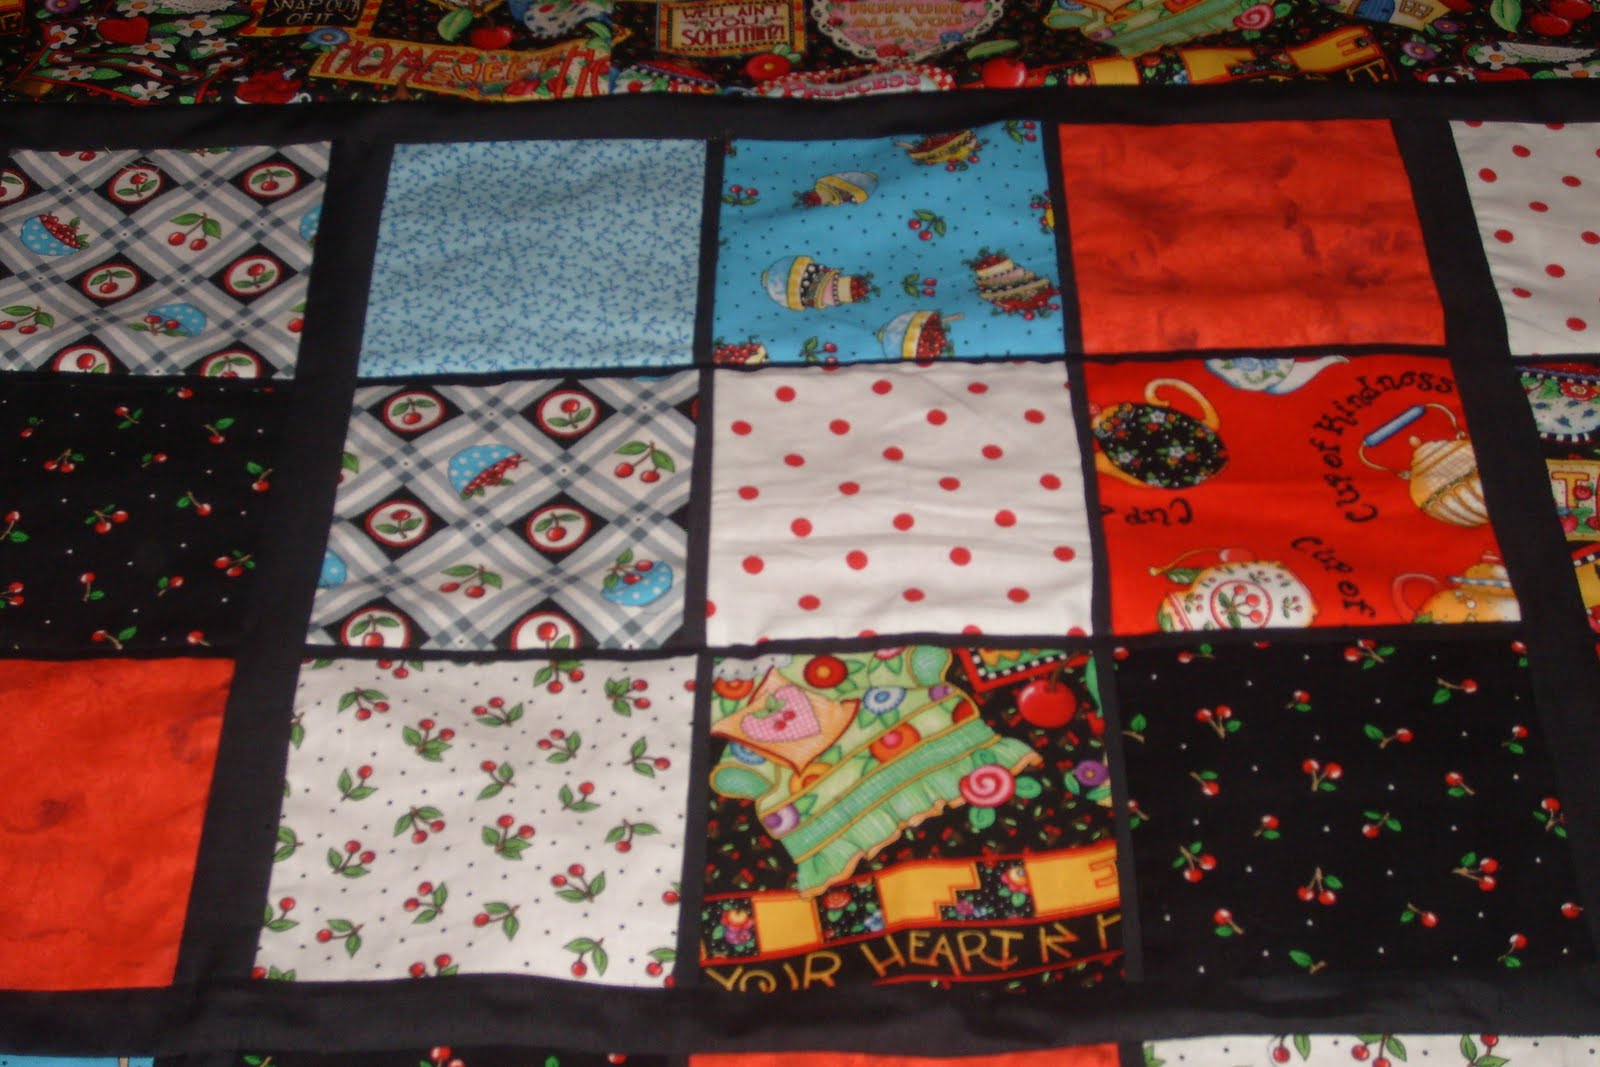
I had 7 ME fabrics, and I needed 9 for the sudoku, so I added a mottled red piece and a red polka-dot on white that I already had.  I figured out the cuts I would need to make (9 squares 5.5 inches of each fabric), and then I planned and figured out how many 1-inch strips (flange) and 1.5-inch strips (sashing) I would need.  My plan is to separate each square of fabric from the others with the flange, and to separate each 9-block grid with sashing.  To make the sudoku even more interesting, I found some old "Extreme Sudokus," which means that each of the nine numbers is present in the left-to-right diagonal and in the right-to-left diagonal.
Finally, I assigned a number (1 to 9) to each fabric and separated the squares into 9 piles of the separate squares.  Sewing the blocks together was just fun -- moving from square to square, adding the flange into each seam.  In just a short time, I had completed one grid, and by the time I went to bed that night, I had the top row of three grids completed!
 I won't bore you with pictures of all 9 grids, but if you want, I'll let you check my work when it is quilted, to be sure I haven't repeated a fabric in a row, column, grid, or diagonal!
 As you can see, each fabric is set off within the grid with a narrow flange of black fabric, and each grid is separated with a one-inch sashing of black.  After enclosing the entire sudoku with black sashing, I added a border of the print fabric on black that has the most representative images from ME art.  The binding will be the cherries on black fabric.
While working on the quilt top, I decided to make use of left-over pieces of the fabrics to make a pieced backing -- something I've not done before.  The pictures that follow show the result of that "design decision," and I'm pretty pleased with it!


 As you can see, I have a strip of each of my nine fabrics, again separated by black sashing.  They are presented in the order I used them in the sudoku, so the back will act as a sort of "key" to the puzzle!  Then I added a wide border of the same fabric I used to border the quilt top.
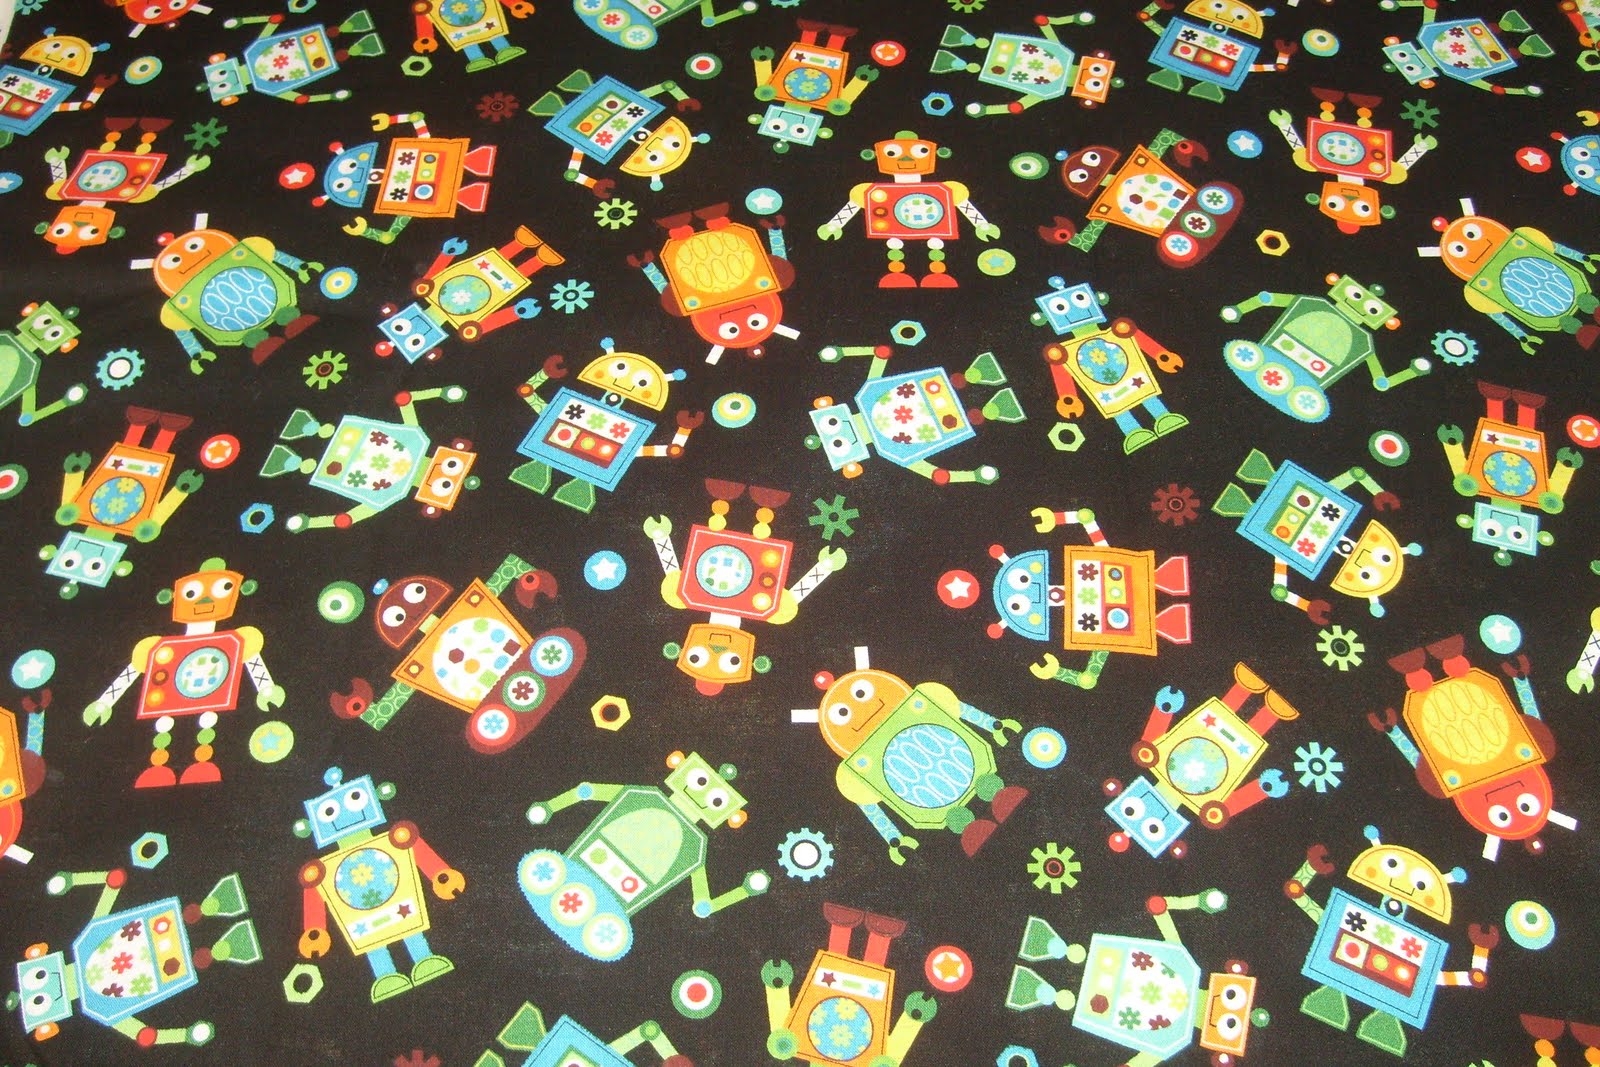
(I tried to rotate this picture, with no success, so just tip your head to the side!)  I'm very excited to get this quilted, but will restrain myself -- I'll wait until the robot quilt is done before I take this one to Cathy!


One thing I'm quite proud of is the success with which I used math to plan my quilt!  I figured out how many 1-inch strips I needed for the flange, and I had exactly the number I needed, with small pieces left over.  I also figured out how many 1.5-inch strips I needed for the sashing, and again was right on the mark.  I will figure out how many strips I need for binding, and I will have that ready before the quilt is ready to be bound.  Who says you don't need math in real life?!
If you decide to do a Sudoku quilt, I'll be glad to assist!  This was really fun to do -- almost as much fun as solving a Sudoku!

Thursday, July 28, 2011

July 27 - Finale!

Pam & Stan.

Michael, Michelle, & Glenna (showing her rotary cutter case).

Karri & Hannah

Diane & Linda

Pam & CJ (caught eating!)

Maria (proprietor of Red Fortune) stopped by to chat.

Could that be Glenna talking with her hands?

CJ  looks pleased to have a photo w/o food!

Cathy Graney was very gracious to allow us to invade her home/quilt shop!  This is the awesome machine she uses to quilt.

She actually demonstrated how the machine works by sewing a few stitches.

Michael & Karri browsed, while Hannah checked out the batting and lovely quilts Cathy has made to demonstrate various quilting patterns.

The "Millennium" long-arm quilting machine!

Again, the machine, with some finished quilts as background.  Cathy has many quilts she has made available for customers to view, as they make their pattern and thread selections.

Cathy taught us a little about how her long-arm machine works.
We met at Red Fortune in Bonner Springs for a delightful lunch, and then we drove to Cathy Graney's (Next-Door Quilting) for a demonstration of long-arm quilting.  Michael & I were happy to leave quilt tops with Cathy to be quilted, and Cathy very kindly allowed us to look around and ask questions!  I think we were all happy to understand a little better the process involved in having our quilts completed.
We missed having Betty with us, who is already back at work :(.  Also, Cindy couldn't join us today because of some (important) business with her husband.  We agreed that this has been an excellent adventure -- time will tell if we are able to continue once school starts!

Tuesday, July 26, 2011

Becca's Robot Quilt

This quilt started with a piece of fabric I found at Hobby Lobby in Lawrence back in January or so.  I was very excited about it, because I could immediately envision a quilt custom-made for my daughter-in-law, who creates robots from "recycled" objects -- canisters, teapots, Tupperware containers, etc.  Since it had some orange in the design (her current favorite color), I also picked up some solid orange fabric to go with it.

As time marched on, and I got acquainted with fabric.com and its MANY choices, I added pieces that I thought would work:  various hand tools in white/gray on a black background, circles that remind me of gears in black on a white background, a darker orange with swirls and the lighter orange dot, etc.  The quilt began to take shape in my mind, and I even began to sketch out what it might look like, trying to figure out measurements, etc.  I even found some wide orange fabric to use for the backing!


Finally, in early July, I began to get serious about making this quilt.  I had decided to cut apart the robot design and frame each piece in a white-on-black windowpane print.  When I did that, I discovered that the dimensions would make the quilt wider than it would be long, so I added some length to that center section before sewing the orange swirl border on, using the black-on-white gear print.  (This is a nod to Becca's steampunk jewelry, which she also makes and sells.)
The next section consisted of two rows of two-inch squares in a series of four fabrics, including the plain orange, in an alternating pattern, all the way around the quilt.  I made this by sewing strip sets of 2 1/2 inches, using four different fabrics, and then cutting them into 2 1/2 inch sections and sewing them together.
While I was in McPherson for the Sisters' Quilting Retreat, I was very excited when I found a companion fabric to the original robot piece I started with:  the same robot figures scattered on a black background!  This became the next row of border, followed by the tools on black, cut lengthwise from the fabric so the tools would NOT be cut up.  (Thanks, Linda, for that suggestion.)  I was afraid I wouldn't have enough length to go all the way around the quilt, so I decided to break up the length with squares of the gear fabric on each corner and in the middle of each side.
Now, as soon as I receive additional "scattered robots" from McPherson's WalMart, I will add one more border, and the quilt will be ready for quilting!  It is larger than I first imagined it would be, but I'm very happy with it.  I'm confident Becca will like it, and it's big enough for her to share with Tony and/or any of their sons she wants to snuggle with!  This has truly been a "design-as-you-go" quilt, and I'm quite pleased with the result.
NOTE:  The pictures aren't placed exactly the way I wanted them to be, but hopefully you can figure out what they are!